
iikoTransport / Poster accounts: POS integration
The ERP account in Eatery Club: the card fields, linking a restaurant, choosing the terminal, and checking that orders reach the POS.
Updated: 13.10.2026An ERP account is the card that connects your POS. Restaurants are linked to it, and only after that can you choose the terminal on the restaurant card and switch on sending orders to the POS. Menu synchronization needs a connected ERP account and a terminal selected for the restaurant.
This article covers connecting Poster and Syrve (iiko). If you have a different POS, contact Eatery Club support and ask about the procedure for it.
The order of the steps
- Set the ERP account up together with Eatery Club support: the connection details depend on your POS.
- Link the restaurants to the account.
- On the restaurant card, choose Terminal («Термінал») and switch on Send this restaurant’s orders to the ERP? («Відправляти замовлення даного ресторану в ERP?»).
- Run Synchronize menu («Синхронізувати меню») in the Products section.
What the account card holds
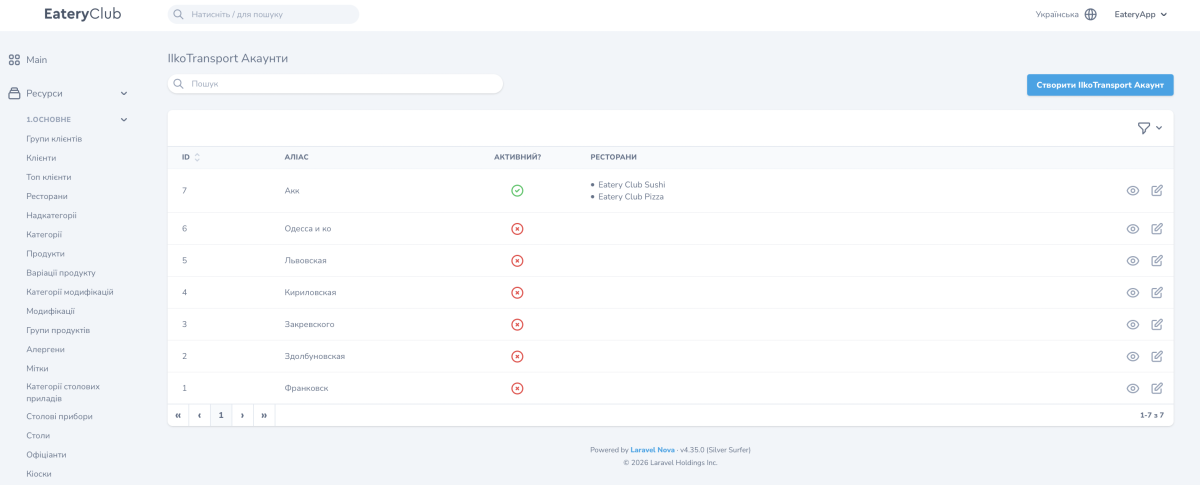
| Field | What it is |
|---|---|
| Alias | The internal name of the card, the one you use to find it in the list. Required |
| Access token | The connection details for the POS. In the form this is a choice from a list |
| Active? | The card’s status switch |
| Restaurants | The restaurants linked to this account. Several values in one field |
| Menu | A text field. Fill it in if your configuration requires it; check with support |
The account list has four columns: ID, Alias, Active? and Restaurants. Use the active-status filter to show only active accounts. View and edit (the pencil) are available on the row. There is no button in this section to start a synchronization or test the connection: synchronization is started in the Products section.
Scenario: connecting a new restaurant to an existing account
- Open Resources, the 6.Settings group, then IIkoTransport accounts («Ресурси», «6.Налаштування», «IIkoTransport Акаунти»).
- Find the account card by its alias and click the pencil.
- Add the restaurant you need in the Restaurants field and save the card.
- Open that restaurant’s card. In the Terminal field choose the location in your POS and switch on Send this restaurant’s orders to the ERP?. Save.
- Go to Products and click Synchronize menu.
How to check the result
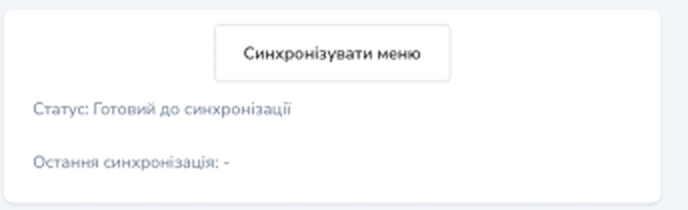
Check the menu right after the synchronization. In the Products section the Synchronize menu button sits at the top of the page, with the Status and Last synchronization lines underneath it. Look at those lines after the run, then find this restaurant’s items in the list. New products arrive inactive, so you switch them on by hand.
You can only see orders reaching the POS on a real order. When a guest places an order at this restaurant, open the orders section and look at its ERP ID: until the order reaches the POS, that field is empty.
The menu in the panel comes from the POS, and synchronization is one-way. Change the price, the weight, and the ingredients in the POS, otherwise the next synchronization overwrites your edits. A product added by hand in the admin panel will not have the ERP ID the system needs to pass an order to the POS. The Products page carries its own warning: products created by hand do not reach your accounting system. There is more on this in the article about working with products.
If orders do not reach the POS
Check these in turn: the account card is active, the restaurant you need is in the Restaurants field, a Terminal is selected on the restaurant card, and the Send this restaurant’s orders to the ERP? switch is on. If all of that is in place and the ERP ID still does not appear on orders, contact Eatery Club support and give them the order numbers and the times.
