Cities: creating and configuring cities
How to create a city in the Eatery Club admin panel, fill in its name and translations, activate it, and what deactivation does to its restaurants.
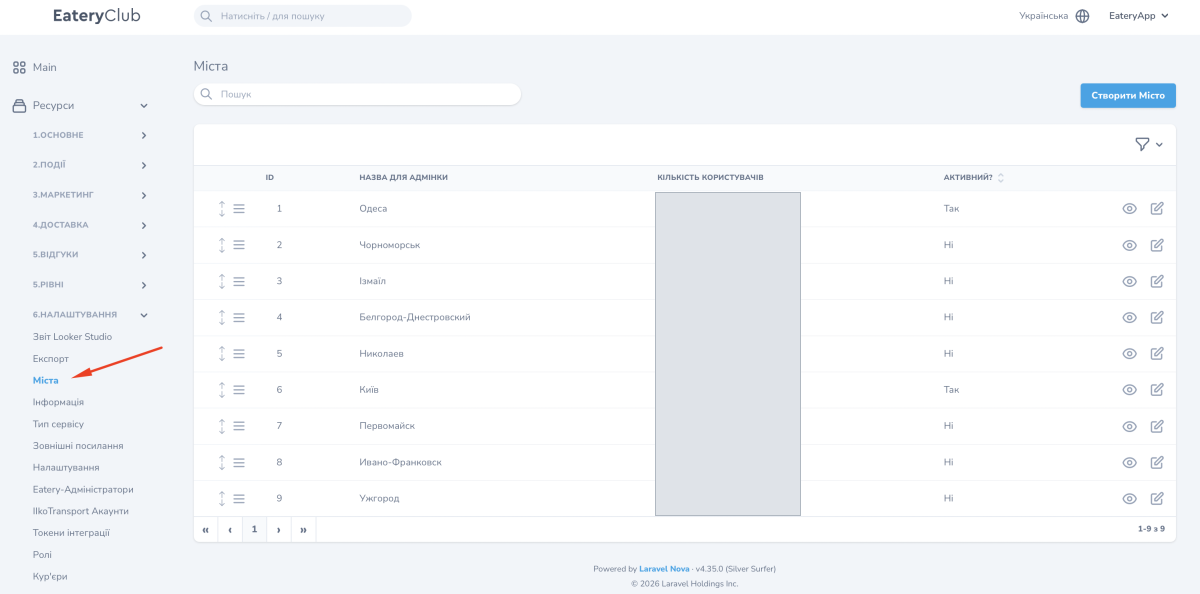
Updated: 18.09.2026The «Міста» (Cities) section in the «Налаштування» (Settings) group holds the list of cities where your restaurants operate. A restaurant cannot be created without a city: if the city you need does not exist yet, create it here first.
City fields
- «Назва для адмінки» (Admin name): the internal name that your team sees in the admin panel.
- «Активний» (Active): «Так» (Yes) or «Ні» (No).
These two fields are everything the city form asks for, and both are required. The section list shows one more column next to them: «Кількість користувачів» (number of users).
Deactivating a city
If a city is deactivated, all restaurants in that city become unavailable to guests. Before you deactivate a city, check in the restaurant list which restaurants are linked to it.
Before you start, have the admin name of the city ready, plus the name in each app language: you need those in the «Переклади» (Translations) block on the last step.
How to create a new city
- Open the «Налаштування» section, then «Міста».
- Click «Створити Місто» (Create city).
- Fill in the «Назва для адмінки» field.
- In the «Активний» field, select «Так».
- Save the city.
- Open the created city with the view button, the eye icon, and fill in the «Переклади» (Translations) block: the city name for each language.
Check the result in the section list: the new city should be there with «Так» in the «Активний?» column.
After that, the city can be selected in the «Місто» (City) field on the restaurant card. The list of restaurant card fields is in the restaurant settings guide.